


Introduction
Project Background
Hello All! This time we will be creating our very own Email Server which will be locally hosted by us. We will be using Postfix and Dovecot for our Back End configuration and will then join it with Squirrel Mail which will serve as our Front End GUI for easier usage of the application.
A quick overview of what this Email Server would do is, we will be simulating a typical email server such as "Gmail, Yahoo, or Outlook". We will be registering new users, sending emails from one user to another and having similar functions to a typical Gmail which you might be using now!
Perquisites
Virtual Machine Workstation (You can install your desired Linux OS) 💻
Postfix 🐀
Dovecot 🕊
Squirrel Mail 🐿
VM Workstation 💻
Configurations
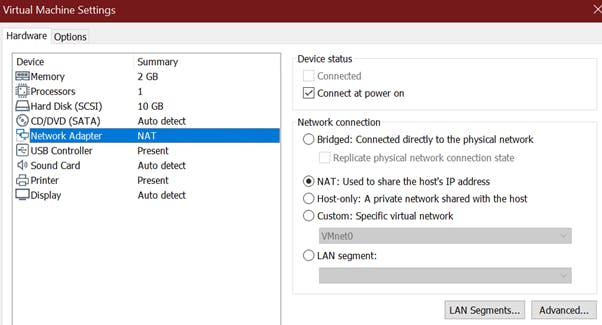
Firstly on our VM, ensure the Network Adapter setting is set to NAT.
Next, we will be creating an additional repository in our VM. Type the following commands to access the repository folder.
# nano /etc/yum.repos.d/remote.repo
Once you have accessed the file, add the following to the file.
[remote]
Name=remote
baseurl=http://download.nus.edu.sg/mirror/centos/7/os/x86_64/
enabled=1
gpgcheck=0
We will now add hostname entries into our /etc/hosts file with our local IP address. Simply put the text as given below into the last line of the /etc/hosts file.
<your ip address> server1.fawaz.local server1
Disable SELINUX by changing SELINUX=enforcing -> SELINUX=disabled. Open the SELINUX file with the following command and make the changes as shown in the picture.
#gedit /etc/sysconfig/selinux

Allow the Apache default port 80 through our systems firewall by entering these 2 commands.
# firewall-cmd --permanent --add-port=80/tcp
# firewall-cmd --reload
Next, we will add 2 new users to our system to send and receive emails from each other. I am just setting some simple passwords for this demo.
#useradd abc
#passwd 123

#useradd efg
#passwd 123
Once that is all done, do a quick restart of the system to ensure everything is booted up correctly.
Postfix 🐀
Installation
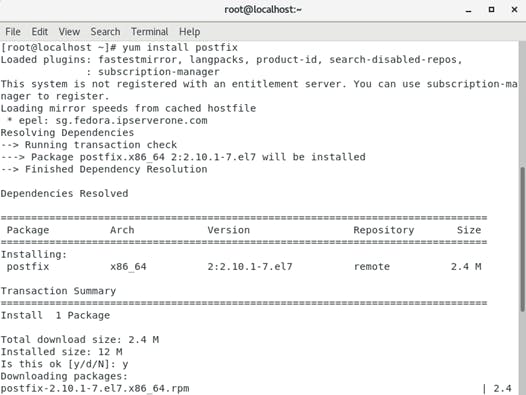
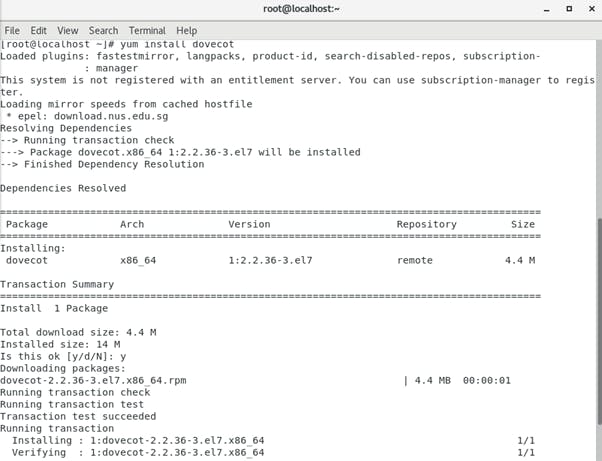
Firstly, we will have to install Postfix in our system. Enter "Y" when prompted with queries.
#yum install postfix
Configurations
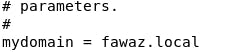
Proceed to open the Postfix configuration file and edit the following information. Enter the following command to open the configuration file.
#gedit /etc/postfix/main.cf
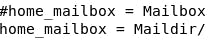
Edit the following lines with the information provided.
Line 76 - Uncomment and set your mail server name

Line 83 - Uncomment and set the domain name
Line 113 - Uncomment and set IPV4

Line 119 - Change inet_protocols to all

Line 164 & Line 166 - Uncomment

Line 264 - Uncomment and add IP Range

Line 419 - Uncomment
Now proceed to save and exit the file.
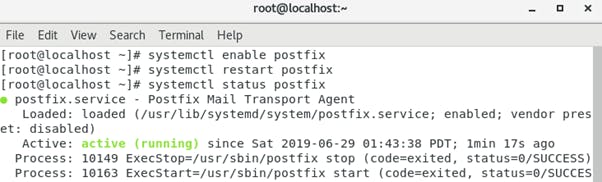
Do a quick Enable, Restart and Status Postfix to ensure it is running successfully. The result should return "active (running)".
Dovecot 🕊
Installation
Now, we will have to install Dovecot in our system. Enter "Y" when prompted with queries.
Configurations
For Dovecot, there are a couple of configuration files we will have to edit. Let us start with the first one.
Open the following file with the command and edit Line 24 by Uncommenting it.
#gedit /etc/dovecot/dovecot.conf

Open the next file with the command and edit Line 24 by Uncommenting it.
#gedit /etc/dovecot/conf.d/10-mail.conf

Open the next file with the command and edit Line 10 by Uncommenting it and
Line 100 by adding the word "plain login".
#gedit /etc/dovecot/conf.d/10-auth.conf


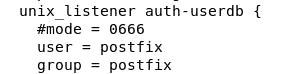
Open the last file to edit with the command below and edit Line 91 and Line 92 by Uncommenting and adding the word "postfix" to both lines.
#gedit /etc/dovecot/conf.d/10-master.conf
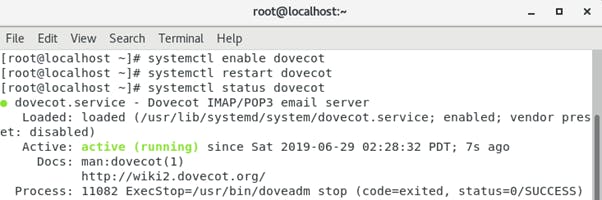
Do a quick Enable, Restart and Status Dovecot to ensure it is running successfully. The result should return "active (running)".
Congratulations! We have configured 2/3 of our main components. Don't give up now! 👊
Squirrel Mail 🐿
Installation
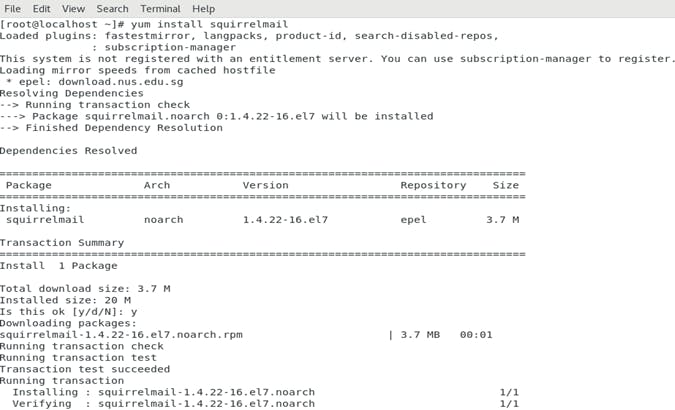
Now, we will have to install Squirrel Mail in our system. Enter "Y" when prompted with queries.
Configurations
For Squirrel Mail, we will edit the server settings and add it as a host in the Apache Web Server settings.
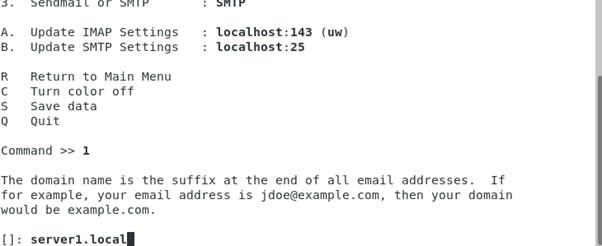
Firstly, change the domain name of the Squirrel Mail Server by entering the configuration file.
# /usr/share/squirrelmail/config/conf.pl
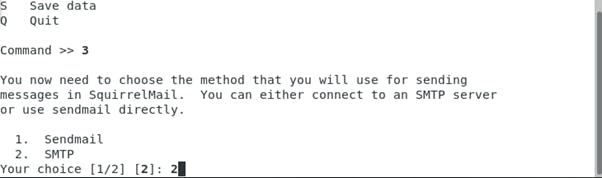
Then change the method of sending emails to our server. We will be choosing SMTP as the send-mail method.
Save the file and exit.
For the Apache configuration, edit the following file respectively with the content given at the very end of the file.
#gedit /etc/httpd/conf/httpd.conf

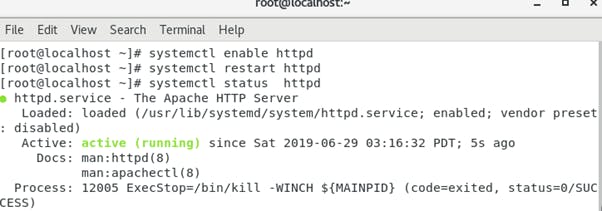
Do a quick Enable, Restart and Status HTTPD to ensure it is running successfully. The result should return "active (running)".
That is all for all our Configurations! Now is the time to test and check if our email server is working! 👊
Outcome
Access the web server of Squirrel Mail via the web explorer on your system. The link will be "YourIPAddress/webmail". The result will look as shown if our configurations are successful.

YAAAAAY!🎊 You did it! Once logged in, you will be able to send email to users within your network just like the existing email platforms. You can add new users and set passwords for them via the terminal, which will then be used to login into Squirrel Mail.
Congratulations once again!!! Thanks for reading all the way through and I hope this article was helpful to you! ✨